I keep my blog as a personal record of what I'm up to, which might be seen as working towards "An elegant sufficiency, content, retirement, rural quiet, friendship, books, ease and alternate labour, useful life"

I'm certainly not there yet.  There is quite some way to go!

Search


Archive

Entries from January 1, 2011 - January 31, 2011

Monday
Jan172011

Black Gold


I’ve heard it said around here that you may consider yourself cultured when you can listen to the William Tell Overture without picturing the Lone Ranger.  When I read the words Black Gold, I immediately thought of the Beverly Hillbillies, so heaven knows what that says about me!

Anyway, we’re not talking about that kind of black gold here, we’re talking Black Gold sewing needles, which Father Christmas very generously included in my stocking – yes, I must have been very good last year.


DSC08638


I was given an assortment of sizes, all of which are quilting needles, all of which are very small – for which, read tiny.  Perfect for me, who likes to use a small needle, given the choice.


DSC08633


With a roll of binding to attach to a fairly large quilt, I had the perfect application, so having machined the binding in place around the edge, I settled myself to begin the satisfying job of turning and handstitching round.


DSC08641


The first challenge is threading the needle.  I notice on the Clover website, someone has requested larger eyes, so clearly I’m not the only one to need a little patience.  But, using the “pinch and push” method of threading (pinch the thread in between your thumb and index finger and push the end into the eye before pulling through) it takes only a dozen or so goes before you achieve success.


DSC08639


The needles are a joy to use, smooth and sharp enough to slide through layers of fabric like butter. 


DSC08642


Nevertheless, the use of a thimble is recommended.

Oh my, I think I need shares in Clover!

Monday
Jan102011

Jellies

Not the edible sort, sadly.  But, these are possibly even more fun.


DSC08541


Two of us found these jelly lens in our stockings on Christmas morning.  Small and not particularly high quality, they more than made up for that in fun value.


DSC08543


One, the grey-blue one, is a soft focus lens.  It has a jelly-like sticky surface which adheres to the lens of an automatic camera or, more probably, the lens of a camera-phone.  Very plasticky, not exceptionally accurate or technically advanced but a bit of a lark.  Anton was happy to model in soft focus.


DSC08544


Here’s a soft focus Kaffe Fassett flower – I’ve been putting a quilt top together today.


DSC08530


The turquoise blue one is a kaleidoscope lens and is even more fun to use.  The front part twists to vary the scene viewed.


DSC08232


So, a shot of the Christmas table brings in all kinds of surprises (and surprise visitors)


Thank you Father Christmas, for finding this bit of fun and nonsense!

Sunday
Jan092011

Useful bags to put things in


I don’t think that title is original and suspect its origin to be Winnie The Pooh related, but I think it describes this year’s Christmas project well.


DSC08521


Several of my friends found themselves on the receiving end of one or more of these bags this year and as much so I can remember how I made them as for any other reason, I’ll share the process here.
 

DSC08493


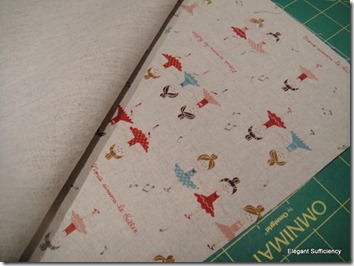
I began with two pieces of Japanese linen/cotton fabric in this case, though many of the Christmas present bags were made from Clarke and Clarke cotton found at Just Fabrics.  For each of these medium sized bags, I cut two pieces of coordinating fabric, each measuring 21 x 14 inches.

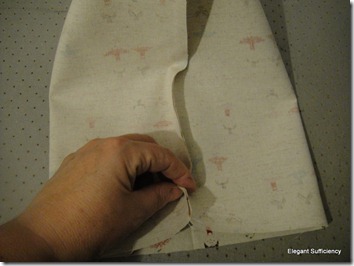
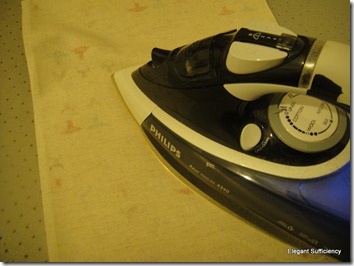
I folded each in half, right sides together matching the two short sides and joined side and bottom together to make two  bags taking about a half inch seam allowance.  I then took them to the ironing board and pressed the bags flat.
 

DSC08495


With me so far?


DSC08497


I opened each bag up and turned it round so that the seam aligned with the fold as shown in the photo, to do a bit of origami.


DSC08498


A square is formed for the base of the bag and with a bit of careful easing, I opened up the seams and pressed gently into shape.


DSC08499


It’s a good time to check that things really do line up straight and even and do a bit of maths.  If I started with a piece of fabric 21 inches and folded in half with a half inch seam allowance, then the bag will be ten inches wide.  If there are four sides to that square base, then each side will be 5 inches.  Correct?
 

DSC08500


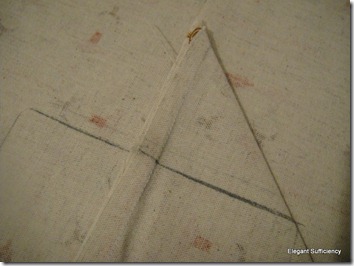
So, using a ruler to keep things straight and accurate as possible, I drew a line at right angles to the seam at the point where it measured 5 inches wide.  Yes, I needed a couple of goes to get it correct but drew it in tailors chalk so I could erase any mistakes!  A quilters rule was useful here because it had useful markings at 45 degrees which made getting these lines in the right place much easier.
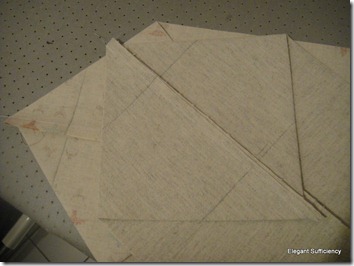
 

DSC08503


I did this at each side of the square for both bags and

took it back to my sewing machine to stitch along the lines I’d drawn.


DSC08504


Now I was able to turn one of the bags right way out and push out the corners.  This cotton fabric is lovely to sew and creates good, crisp seams.
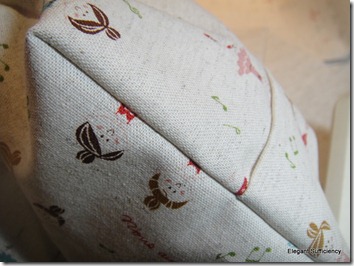
 

DSC08505


I put the patterned bag inside the plain bag, right sides together and lining the seam of one match the fold of the other (easier to do than explain).  This means that the seams on the base are at right angles to one another rather than one on top of the other – making a neater and more sturdy finish.
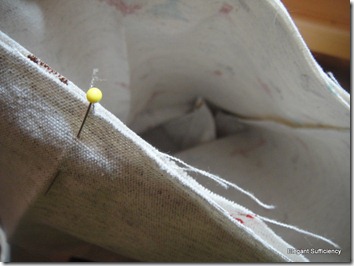
 

DSC08506


I stitched around the top edge, taking a scant half inch seam allowance and leaving a 3 inch gap to turn the bag through.
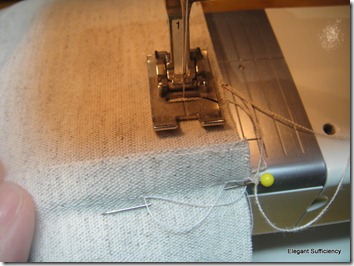
 

DSC08509


The two bags fit together so well that this is really easy and quick to do.
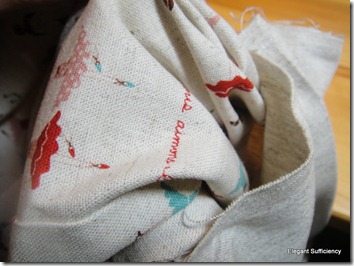
 

DSC08512


Turning them right way out is fairly straightforward too and the whole thing can be given a bit of a shake and teased into shape.  These fabrics are great to work with.
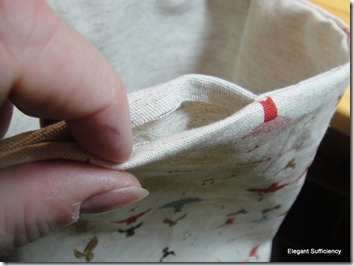
 

DSC08513


The small opening through which the bag was turned was easy to neaten and I didn’t other pinning or anything but simply topstitched the edge in one go.
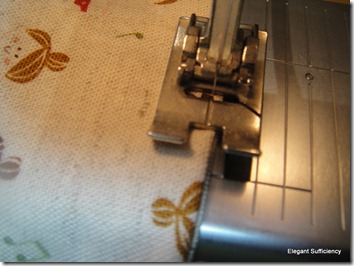
 

DSC08514


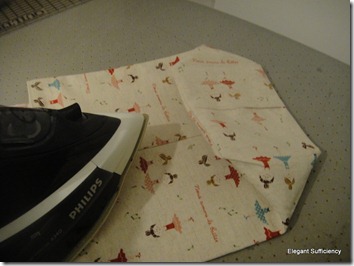
I made sure the folds in the base were all folded downwards and, because I’d sewn the two layers together with the seams forming a cross, the four triangular flaps all meet in the middle, forming a relatively firm base.

Does that make sense?
 

DSC08517


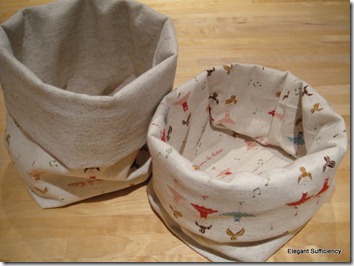
I gave the bag a press and trimmed off loose ends before opening up and turning over the top edge a couple of times, which makes it stand up nicely.  Best of all, these are great to make in series – cut several pieces of fabric out, get the production line going and in no time at all, you’ve got a nice lot of bags ready for little girls to put things in.
 

 DSC08526


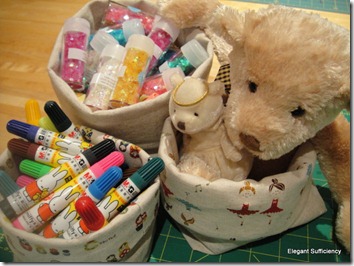
What do little girls put into these bags?  Teddies, glitter and felt pens, it seems!
 

 DSC08519


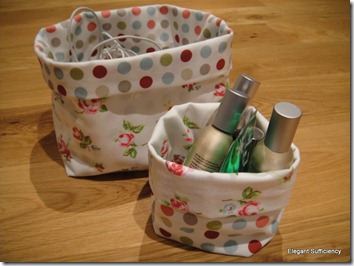
Though bigger girls might use them for knitting bits and pieces, for chargers and wires and bits of makeup, perhaps.  Large bags can be used for home baked bread loaves – our favourite use of all.
 

DSC08018


I’ve made these bags in four sizes:

Extra Small (with perfume and handcream in above): cut fabric 16” (+ 1” seam allowance) x 10”, base measures 4” square.

Small (with felt pens in above): cut fabric 18”(+ 1” seam allowance) x 12”, base measures 4.5” square

Medium (Teddy and glitter size above) 20”(+ 1” seam allowance) x 14”, base 5” square

Large (shown holding wires above, but could be used for bread) 24”(+ 1” seam allowance) x 16”, base 6” square.  I find this is about as large as I like to go without interfacing.

Of course, fabric can be any size, but I like to make the maths of working out the base easy. 


Have fun!!

Thursday
Jan062011

Salute!


Salute02


Everyone around here knows exactly what was happening twenty six years ago today.  We went shopping in Bath on the morning of the 5th January 1985 and then returned home to take down the Christmas decorations.  After a warm bath I decided it might be a good idea to telephone Stroud Maternity Hospital and late in the evening we took their advice and drove over there as the snow started to fall.

The rest is history.

Happy Birthday Edward!!

Tuesday
Jan042011

Roses


I’ve written before of my love of things Clover so finding a new gadget in my stocking brought a smile to my face.


DSC08419


Better than that…


DSC08420


Three different sizes of Rose Maker.  It’s been a dreary old day here, the roads were so slippy this morning that the whole village was doing a Skating on Ice impression in their cars and so I chose to stay at home and fiddle about before work begins tomorrow.


DSC08422


Anyway, as usual, the instructions are enough to fill one with fear and dread until the foreign languages are discarded and the one relevant section is identified.


DSC08423


Having cut the correct size piece of fabric – this is some old sheeting I dyed – the two template pieces are pinned either side of the strip by inserting the pins through the holes provided.  Easier said than done, for lining them up accurately isn’t as straightforward as you’d imagine.


DSC08424


Having done that, it’s time to being sewing.  Easy to see where to start


DSC08425


The instructions suggest taking 1cm long stitches, so I did.  I also used double thread because, reading ahead, I spotted that these stitches will be pulled up to gather the fabric.


DSC08427


It’s a simple process of folding and stitching, though the folds distort the fabric a little and it has to be pulled straight to stitch.  Soon, a circle is formed by the folds and it’s time to stop.


DSC08429


Removing the pins means that the plastic templates can be pulled through the fabric tube and the seam straightened out a little.


DSC08430


Pulling the thread creates a few loose gathers


DSC08431


The hairgrip (supplied – haven't seen one of those in years!) is used to anchor the first little seam and to begin rolling the centre of the flower.


DSC08432


It’s easy to do that and the stitched fabric tube curls up very readily.


DSC08433


Having rolled the whole piece up, it can be secured with the needle and thread,


DSC08434


before taking the needle completely through the base of the rose, anchoring all layers with large stitches and finally finishing off the thread securely.


DSC08436


There it is, the finished rose, which would have looked better had I engineered it in a way so that the deeper shades were in the centre.  Never mind.  Not bad, eh?


Thank you, Father Christmas.  I’m delighted with your choice of gift for me!